Creating a Nillion Wallet
Create a Nillion wallet to connect to the Nillion Testnet and access your assets.
Supported Wallets
How to create a Nillion wallet and connect to the Nillion Testnet
This guide walks you through downloading a wallet, setting up your wallet, and adding the Nillion Testnet.
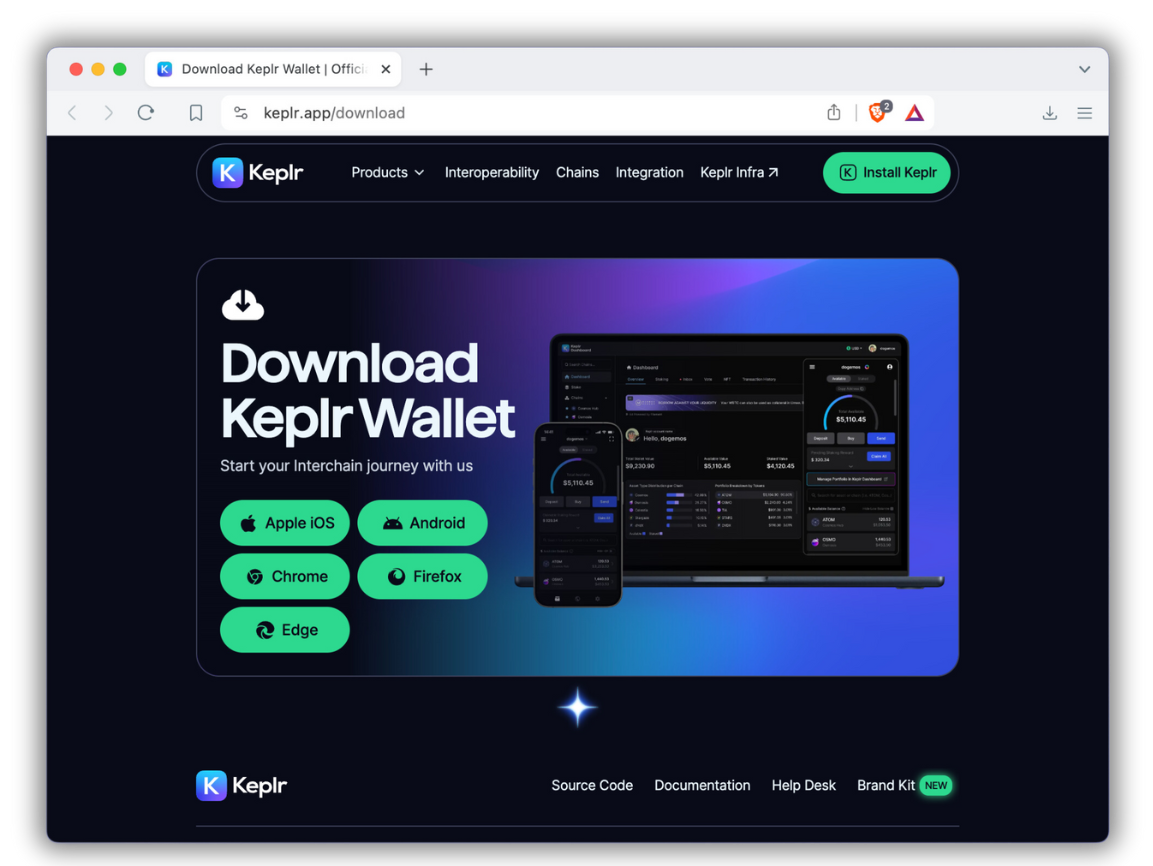
1. Download Keplr
Visit the Keplr download page and select your browser to download the Keplr browser extension. We recommend Chrome.
2. Install the Keplr browser extension
Click "Add to Chrome" to install the Keplr Chrome extension.

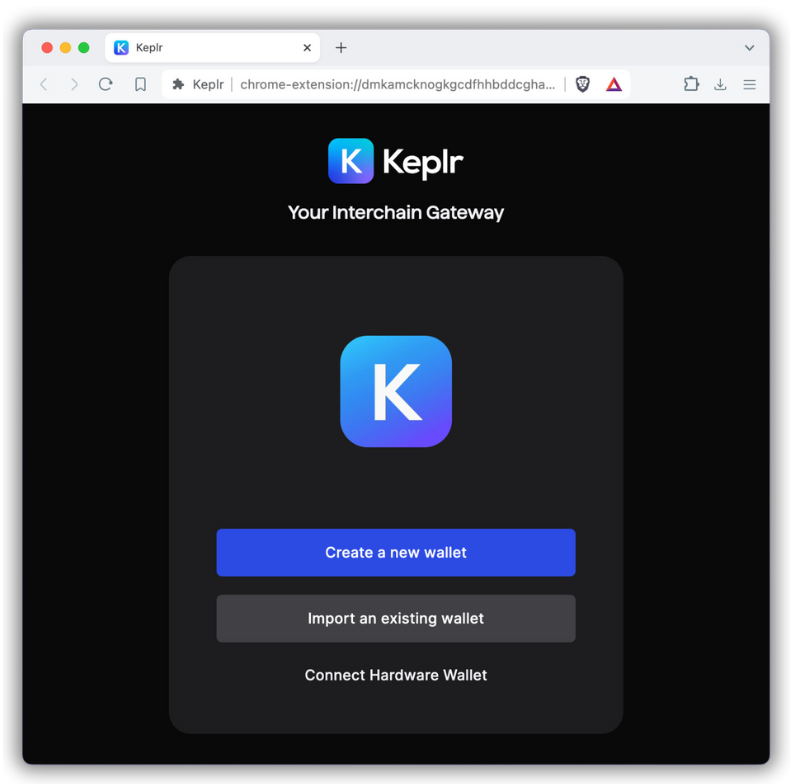
3. Create a new wallet
After Keplr is installed, it will pop open in a new tab. Click "Create a new wallet."
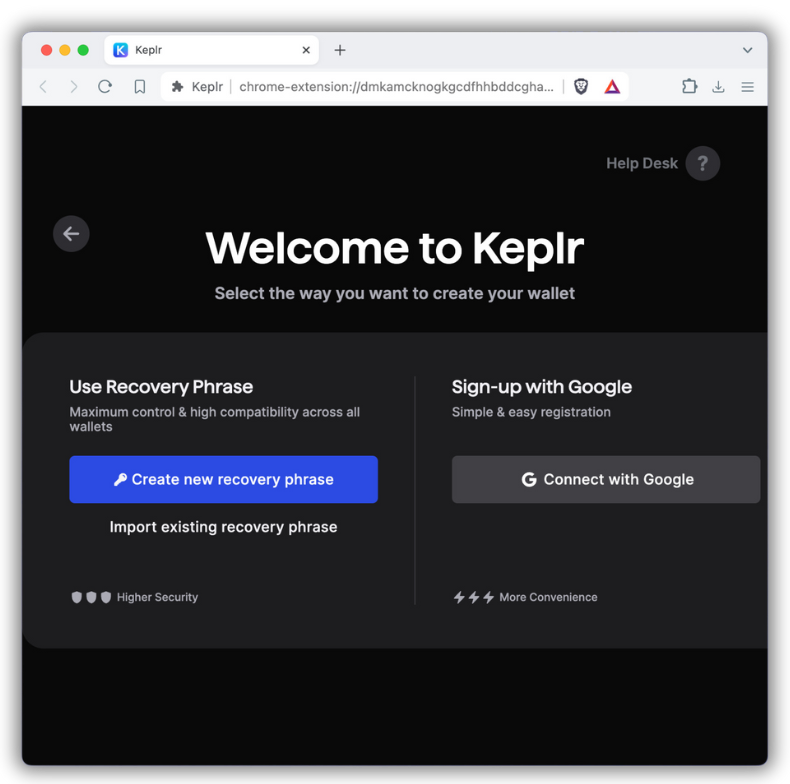
4. Create a recovery phrase
Create a wallet using a recovery phrase. Click "Create new recovery phrase."
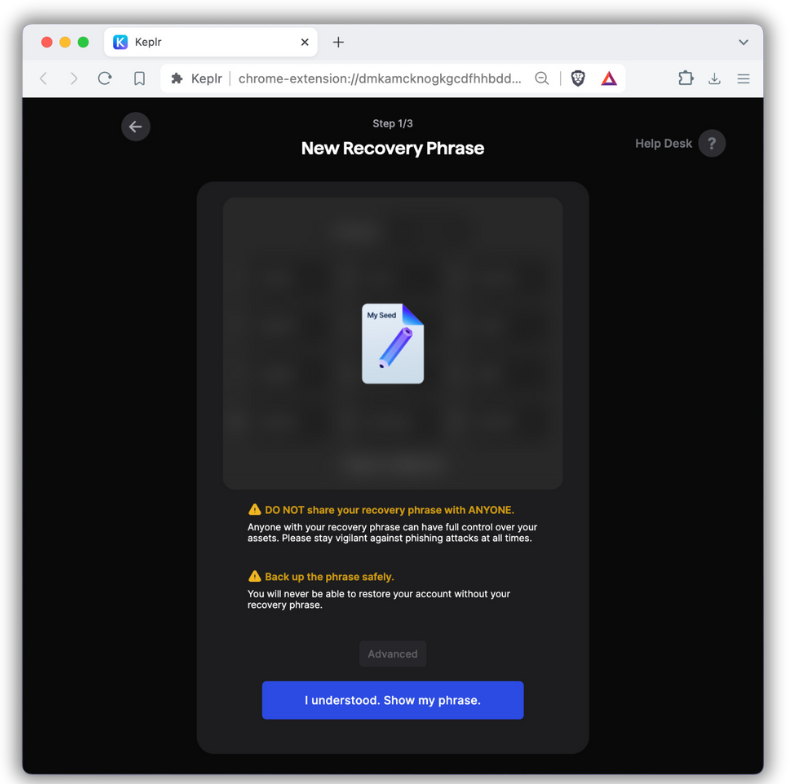
5. Secure your recovery phrase
Follow the steps to show your recovery phrase. Make sure to store your secret recovery phrase securely.
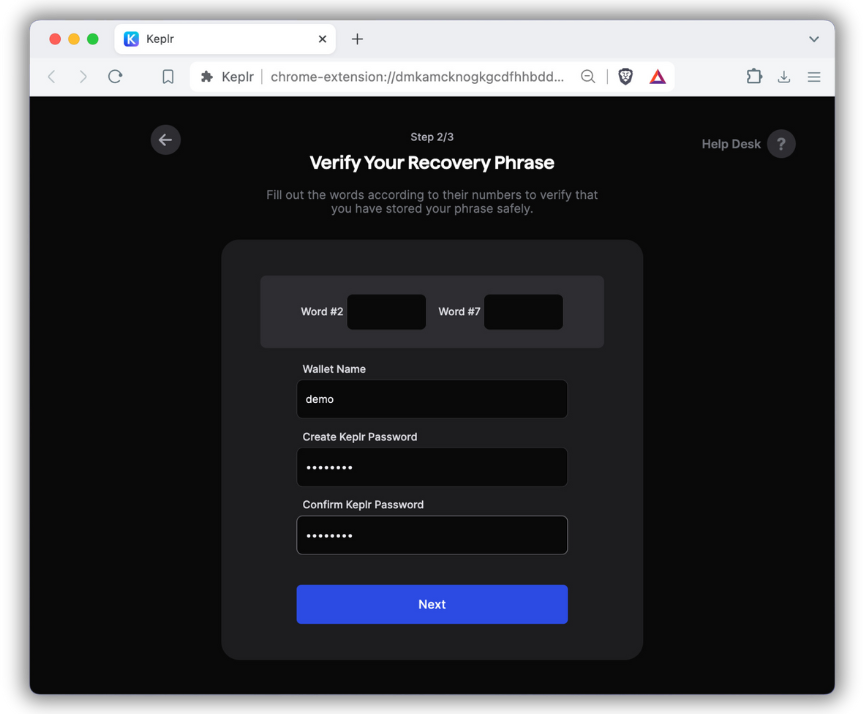
6. Set a wallet password
Verify your recovery phrase by filling in ordered words. Then name your wallet and set a password. You'll use this password to log into Keplr on this device. To import this wallet for use on another device, you'll need the recovery phrase.
7. Add Nillion Testnet
-
Toggle open the "Extensions" button in your browser and pin the Keplr extension so that the browser has access to it.
-
Open the Keplr Chains page and search for "Nillion." Click "Add to Keplr."
-
"Approve" adding the Nillion Testnet within Keplr.
-
In the Keplr extension, click the hamburger menu and click "Manage Chain Visibility." This opens the Select Chains page in a new tab. Search for "NIL" and click the checkmark to make the Nillion Testnet visible from within Keplr. Click "Save."
-
Verify setup by toggling Keplr back open. Scroll down to the bottom of the "Home" tab, where you should see a new NIL token balance of 0 NIL.
8. Find your new Nillion wallet address
-
From your Keplr extension, click the "Copy address" button.
-
Now you'll see addresses for all enabled chains. Filter for "NIL"
-
Click to copy your Nillion wallet address to your clipboard. Your Nillion wallet address is safe to share with others; they'll need your wallet address to send you NIL.
Nice! You've set up your Nillion wallet and have a Nillion wallet address. Next, use the Faucet to get some Testnet NIL.